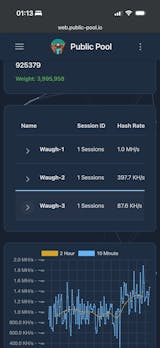
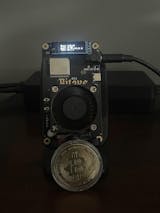
Here is the quick review and set-up video:
Looking to get started with crypto mining from the comfort of your home or office? The Goldshell BYTE Miner is your perfect companion — compact, quiet, and incredibly easy to set up. In this guide, we’ll walk you through the full setup process, including unboxing, hardware installation, and connecting to Wi-Fi.
📦 What’s in the Box?
When you order the Goldshell BYTE Miner from our shop, your package includes:
-
1x Goldshell BYTE Miner (135 x 63 x 106 mm, 0.4 kg)
-
1x Goldshell Wall Charger (68 x 30 x 80 mm, 0.382 kg)
-
1x AE or DG Mining Card (varies based on your selection)
-
Quick start guide and safety instructions
Each unit is pre-tested for quality and shipped securely to ensure safe delivery.
🔌 Step 1: Connect the Wall Charger
The Goldshell Wall Charger is designed for efficiency, with adjustable output (5V-20V, up to 140W).
To connect:
-
Plug the charger into a standard wall outlet (100–240V).
-
Connect the output cable to the BYTE Miner’s power port.
-
The device will power on automatically — no external switch needed.
⚠️ Tip: Make sure the charger is placed in a well-ventilated area for optimal heat dissipation.
🧠 Step 2: Insert the Mining Card (AE or DG)
Depending on your mining goals, you’ll be using either the AE Card or the DG Card:
-
AE Card: Hashrate of 4.5–5.5 MH/s at 10–11.82 J/MH
-
DG Card: Hashrate of 65–80 MH/s at just 0.69–0.81 J/MH
Installation steps:
-
Power off the BYTE Miner (unplug the charger).
-
Gently slide the card into the designated slot until it clicks.
-
Reconnect the power supply.
🛠️ Both cards run at 5500 rpm and support two power modes (default 45W, high-power 65W). Choose your mode in the Goldshell dashboard after setup.
🌐 Step 3: Connect to Wi-Fi
The BYTE Miner features built-in Wi-Fi for seamless, clutter-free operation. Here’s how to connect:
-
On a laptop or smartphone, search for nearby Wi-Fi networks.
-
Connect to the miner’s temporary network (e.g.,
Goldshell-XXXX). -
Open a web browser and go to
192.168.0.1. -
Select your home/office Wi-Fi and enter the password.
-
The miner will reboot and connect to your selected network.
✅ After connection, find the miner’s IP address using the Goldshell Miner Tool or your router admin page.
🖥️ Step 4: Access the Goldshell Dashboard
-
Enter your miner’s IP address in your browser.
-
Log in with the default credentials (usually
admin/admin). -
Add your mining pool address and wallet info.
-
Save the configuration and start mining!
The interface allows you to:
-
Monitor real-time hashrate and temperature
-
Switch between power modes
-
Check fan speeds and device health
🧊 Step 5: Optimize for Performance & Quiet Operation
-
Noise level: Only 45 dB — ideal for bedrooms, offices, or workspaces.
-
Optimal temperature: Operates best between 0–35°C with ≤65% humidity.
-
Placement: Ensure it's in a well-ventilated space with minimal dust.
💬 Final Thoughts
The Goldshell BYTE Miner offers a powerful, plug-and-play mining experience in one of the smallest and quietest forms available. Whether you're a beginner or a seasoned miner, it’s a smart addition to your portfolio.
✅ Ready to Start Mining?
🛒 Order your BYTE Miner today from our online store!
💬 Have questions? Contact us via chat or email — we’re here to help.


