Product Link - https://bitcoinmerch.com/products/bitcoin-merch%C2%AE-mars-lander-3-all-in-one-lottery-miner-full-node-pre-order
Congratulations on your new Mars Lander 3! The easiest way to run a Bitcoin Node and host your own private mining pool. Let's get you up and running
Step 1: Plug it in
Your Mars Lander 3 comes with a USB-C power supply. Plug your device into an outlet and let it start up. Wait for the screen to turn on and load
Step 2: Set up the Bitaxe Gamma inside of your Mars Lander
The Bitaxe in your Mars Lander has to be set up separately and pointed at the Mars Lander pool. It is best to set it up before connecting your Mars Lander to your internet.
To do this, use your smartphone or computer to locate and connect to the "Bitaxe_XXXX" Wi-Fi network. Select 'YES' if asked to continue without internet access.
AxeOS will pop up on your screen prompting you to connect the Bitaxe to your WiFi
Hostname: Name your Bitaxe
Wi-Fi SSID: Your 2.4G Wi-Fi Network
Wi-Fi Password: Make sure it's correct to avoid issues.
Click Save then Restart
Next, you have to point the Bitaxe at your Mars Lander Pool. Once connected to WiFi, the screen on the Bitaxe inside the Mars Lander will display an IP address (192.168.x.xxx). Go to this IP address in a web browser to load the miner's dashboard.
Go to the Pool Settings tab and change the following settings:
Stratum Host:
ml3.local
(This is ML3.LOCAL but must be lowercase)
Stratum Port:
3333
Stratum User:
Copy and Paste your BTC address here
Press Save and Restart if prompted.
Step 3: Connecting the Node to Internet
Your Mars Lander 3 can connect via WiFi or Ethernet. We recommend ethernet for the initial setup for faster syncing with the Bitcoin blockchain.
A) Plug your Mars Lander 3 into your router with an ethernet cable
or
B) Tap the WiFi icon on the left of the screen. On the Network page, press the Scan button to search for your network. Select your Wi-Fi network and enter the password correctly.
Step 4: Let the Bitcoin Blockchain download/sync
On the dashboard page, you can see the download progress in the top left corner of the screen. It begins downloading automatically once your Mars Lander 3 is connected to the internet. This can take hours or even days depending on your internet connection.
Step 5: Start your mining pool
Once the blockchain has synced to 100%, it's time to start running your own private mining pool!
On the Node & Pool page on the settings, if it didn't start automatically press the Start button on the Solo Pool.
Note: You can't start the pool until the blockchain has synced to 100%.
A stratum URL and a port number will be displayed. This is what you use for your other miners' settings when pointing them at your pool. Example- ml3.local:3333 OR 192.168.0.100:1234
Please note if you are using an Avalon or miner that uses the entire Stratum URL, you have to include stratum+tcp:// before the URL. i.e. stratum+tcp://ml3.local:3333
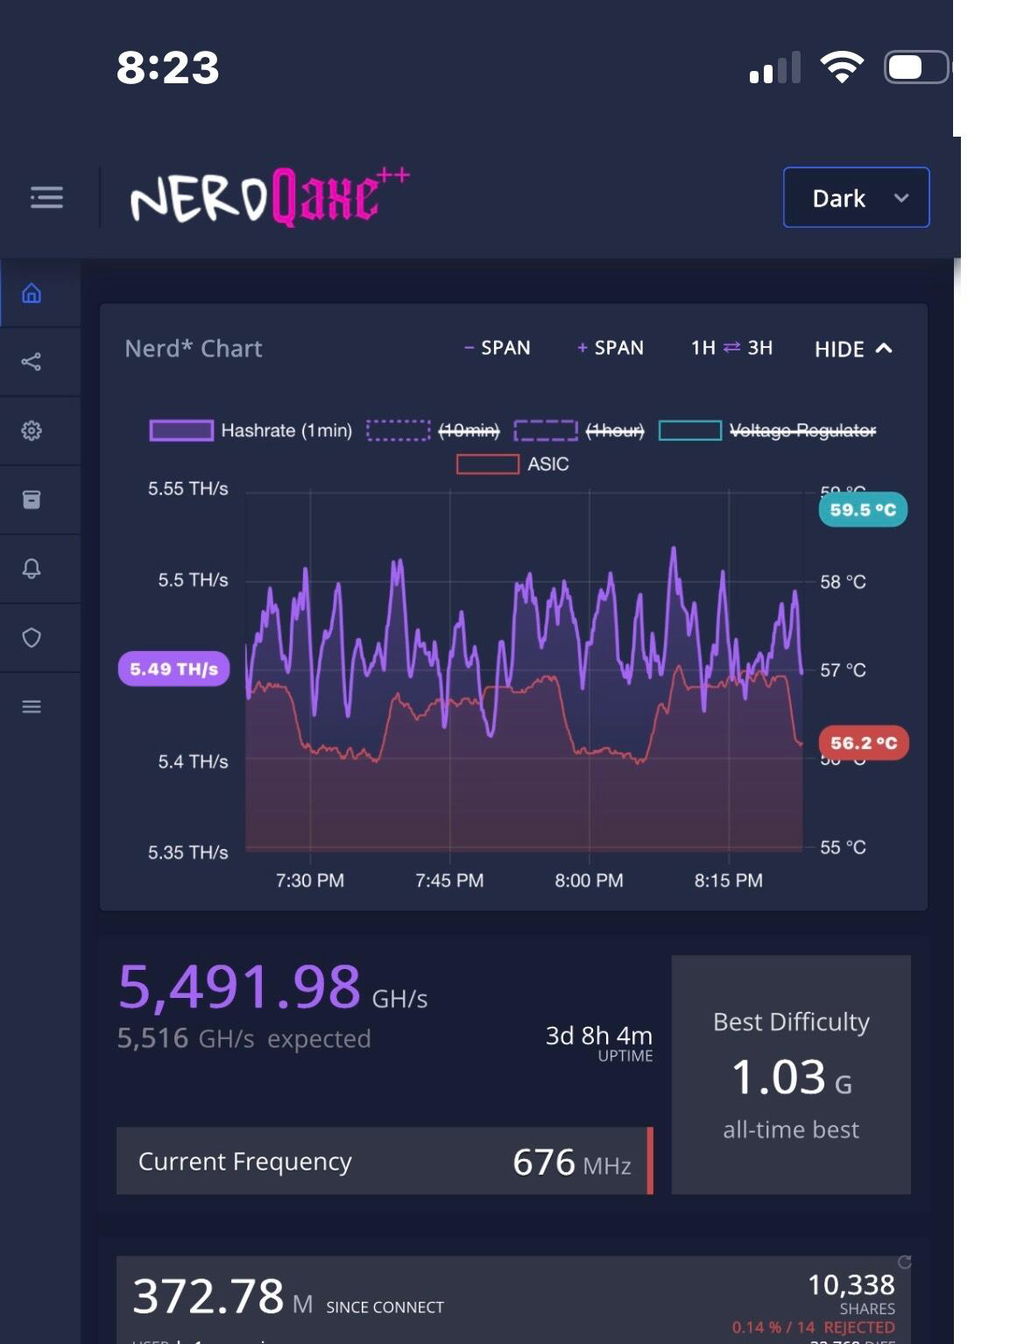
Your Mars Lander home screen will now display the hashrate of the Bitaxe in the center of the screen. Point your other miners using the settings above and it will be added to the total pool hashrate on the screen!
Running your own node and mining to your own private pool is one of the most important things you can do for Bitcoin. It means you are verifying the network for yourself, enforcing the rules of Bitcoin independently, and helping keep the system decentralized and resistant to control.
With the Mars Lander 3, your Bitaxe isn’t just mining. It’s contributing hashpower directly through your own node, on your own terms. Every share submitted strengthens the idea that Bitcoin belongs to individuals, not corporations or centralized pools.
Thank you for being part of the mission to keep Bitcoin sovereign, distributed, and unstoppable. 🚀